www.awsgood.com
在CentOS7上安装Zabbix2.4.4
关于Zabbix
Zabbix是监控服务器、应用程序、网络及网络设备等的可用性及性能的开源的企业级监控软件。 即Zabbix具备了运行监控/资源监控/应用软件监控功能。
Zabbix虽然是开源的监控软件,但是拥有服务器监控所需的监视功能、故障检测功能及告警等丰富的功能,并且提供Web界面的管理页面,使配置过程非常简单。
Zabbix是拉托维尼亚的Zabbix SIA公司的注册商标,目前已他们为中心进行着Zabbix的开发和功能改进。
安装Zabbix2.4.4
2015年4月15日的Zabbix最新版本是2.4.4。Zabbix官网:下载Zabbix
配置环境
- 系统:CentOS7
- Web:Apache2.4.6
- 数据库:Mariadb5.5.41
- PHP:5.5.6
- Zabbix Server:2.4.4
- Zabbix Agent:2.4.4
安装PHP
配置yum源
# rpm -Uvh http://ftp.iij.ad.jp/pub/linux/fedora/epel/7/x86_64/e/epel-release-7-5.noarch.rpm
# rpm -Uvh http://rpms.famillecollet.com/enterprise/remi-release-7.rpm
确认安装的php版本
# yum list --enablerepo=remi --enablerepo=remi-php56 | grep php
安装PHP5.6Zabbix需要一些指定PHP模块,在这里指定了常用的所有模块。Zabbix需要的PHP模块查看官网 Zabbix2.4.4官方文档
# yum install --enablerepo=remi --enablerepo=remi-php56 php php-opcache php-pecl-apcu php-devel php-mbstring php-mcrypt php-mysqlnd php-phpunit-PHPUnit php-pecl-xdebug php-pecl-xhprof php-pdo php-pear php-fpm php-cli php-xml php-bcmath php-process php-gd php-common
查看PHP版本
# php -v
PHP 5.6.6 (cli) (built: Feb 19 2015 10:19:37)
Copyright (c) 1997-2015 The PHP Group
Zend Engine v2.6.0, Copyright (c) 1998-2015 Zend Technologies
    with Zend OPcache v7.0.4-dev, Copyright (c) 1999-2015, by Zend Technologies
    with Xdebug v2.3.1, Copyright (c) 2002-2015, by Derick Rethans
安装Mariadb
安装MariaDB并查看其版本。
# yum -y install mariadb mariadb-server
# mysql --version
mysql  Ver 15.1 Distrib 5.5.41-MariaDB, for Linux (x86_64) using readline 5.1
启动MySQL及配置开机启动
# systemctl start mariadb
# systemctl enable mariadb
# systemctl list-unit-files | grep mariadb
mariadb.service                        enabled
安装Apache
安装Apache并查看其版本。
# yum -y install httpd
# httpd -v
Server version: Apache/2.4.6 (CentOS)
Server built:   Jan 12 2015 13:22:31
修改httpd.conf
# vi /etc/httpd/conf/httpd.conf
ServerName <YourDomainName>
启动Apache及配置开机启动
# systemctl start httpd
# systemctl enable httpd
# systemctl list-unit-files | grep httpd
httpd.service                          enabled
安装Zabbix2.4.4
安装字体
# cd /tmp
# wget http://repo.zabbix.com/zabbix/2.4/rhel/7/x86_64/zabbix-2.4.4-1.el7.x86_64.rpm
# rpm -ivh zabbix-2.4.4-1.el7.x86_64.rpm
# yum install -y dejavu-sans-fonts
安装Zabbix Web及Zabbix Web Mysql
# wget http://repo.zabbix.com/zabbix/2.4/rhel/7/x86_64/zabbix-web-2.4.4-1.el7.noarch.rpm
# wget http://repo.zabbix.com/zabbix/2.4/rhel/7/x86_64/zabbix-web-mysql-2.4.4-1.el7.noarch.rpm
# rpm -ivh zabbix-web-mysql-2.4.4-1.el7.noarch.rpm zabbix-web-2.4.4-1.el7.noarch.rpm
安装Zabbix Server
# yum install -y OpenIPMI-libs fping iksemel net-snmp unixODBC
# wget http://repo.zabbix.com/zabbix/2.4/rhel/7/x86_64/zabbix-server-2.4.4-1.el7.x86_64.rpm
# wget http://repo.zabbix.com/zabbix/2.4/rhel/7/x86_64/zabbix-server-mysql-2.4.4-1.el7.x86_64.rpm
# rpm -ivh zabbix-server-2.4.4-1.el7.x86_64.rpm zabbix-server-mysql-2.4.4-1.el7.x86_64.rpm
创建Zabbix数据库
# mysql -uroot -p
Enter password:
MariaDB [(none)]> CREATE DATABASE zabbix CHARACTER SET utf8 COLLATE utf8_bin;
MariaDB [(none)]> GRANT ALL ON zabbix.* TO 'zabbix'@'localhost' IDENTIFIED BY '<password>';
MariaDB [(none)]> exit
导入数据
# cd /usr/share/doc/zabbix-server-mysql-2.4.4/create/
# mysql -uzabbix -p zabbix < schema.sql
 # mysql -uzabbix -p zabbix < images.sql
 # mysql -uzabbix -p zabbix < data.sql
修改zabbix_server.confDBPassword是必须配置的,数据库名及用户使用默认的话,无需配置。
- DBName:数据库名(默认是zabbix)
- DBUser:连接数据库的用户名(默认是zabbix)
- DBPassword:连接数据库的密码
# vi /etc/zabbix/zabbix_server.conf
DBName=zabbix
DBUser=zabbix
DBPassword=<password>
启动Zabbix Server及配置开机启动
# systemctl start zabbix-server
# systemctl enable zabbix-server
# systemctl list-unit-files | grep zabbix-server
zabbix-server.service                  enabled
安装Zabbix Agent
# wget http://repo.zabbix.com/zabbix/2.4/rhel/7/x86_64/zabbix-agent-2.4.4-1.el7.x86_64.rpm
# rpm -ivh ./zabbix-agent-2.4.4-1.el7.x86_64.rpm
启动Zabbix Agent及配置开机启动因Zabbix Server及Zabbix Agent在同一台主机上,不配置zabbix_agentd.conf文件。
# systemctl start zabbix-agent
# systemctl enable zabbix-agent
# systemctl list-unit-files | grep zabbix-agent
zabbix-agent.service                   enabled
Web UI安装
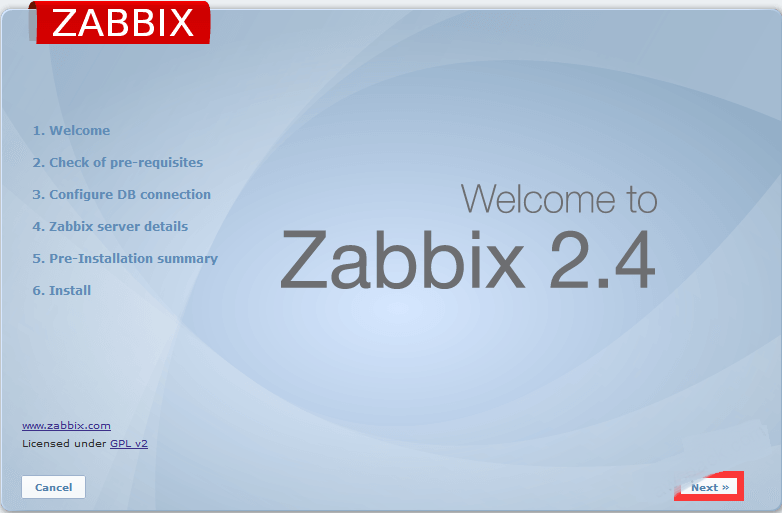
访问如下IP以后,点击[Next]
- http://YourDomainName/zabbix
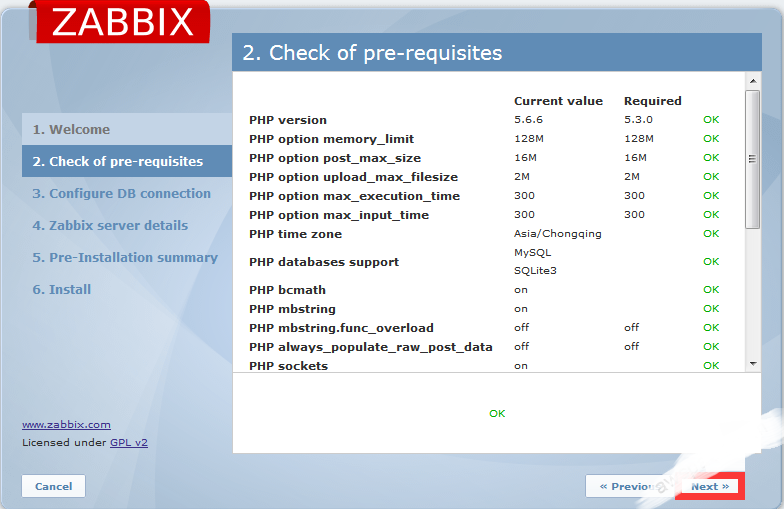
 确认环境没有问题以后,点击[Next]
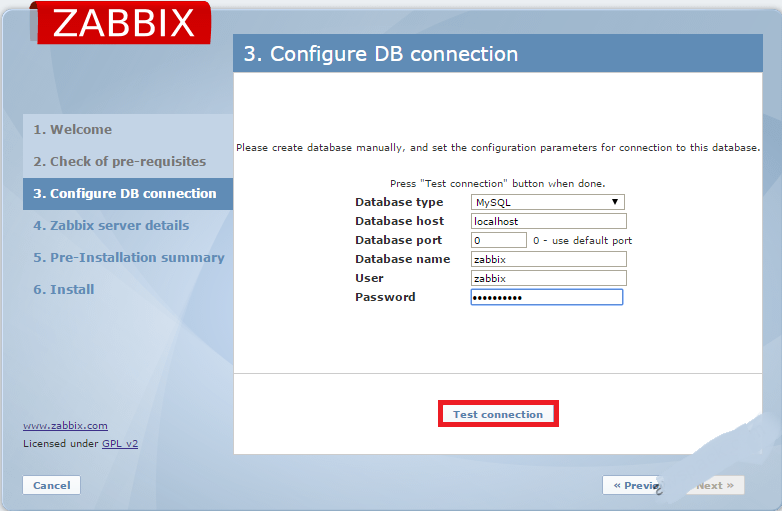
输入连接数据库信息以后点击[Test connection]
- Database type:MySQL(选择数据库的类型)
- Database host:localhost(填写执行数据库的主机名或者IP)
- Database port:默认(3306)
- Database name:zabbix(创建Zabbix数据库时指定的名字)
- User:Zabbix数据库的用户名
- Password:Zabbix数据库的密码
 Test conneciton(连接数据库的测试)结果OK的话,点击[Next]
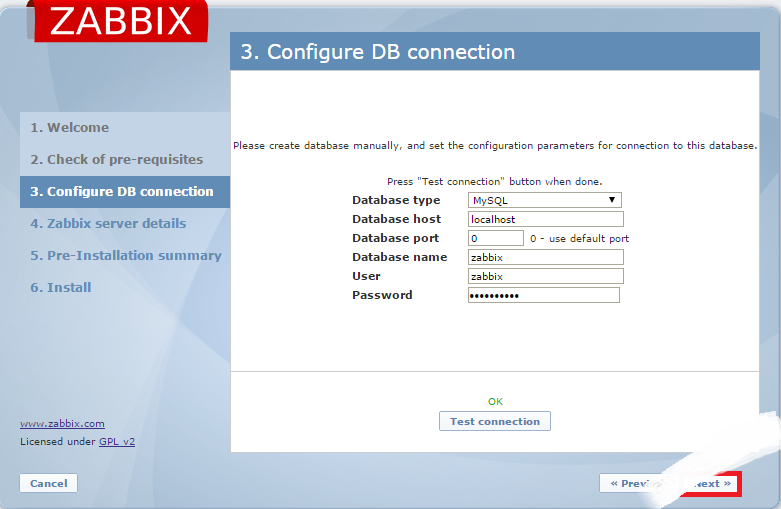
点击[Next]
- Host:执行Zabbix Server主机名
- Port:Zabbix Server的端口
- Name:可选项
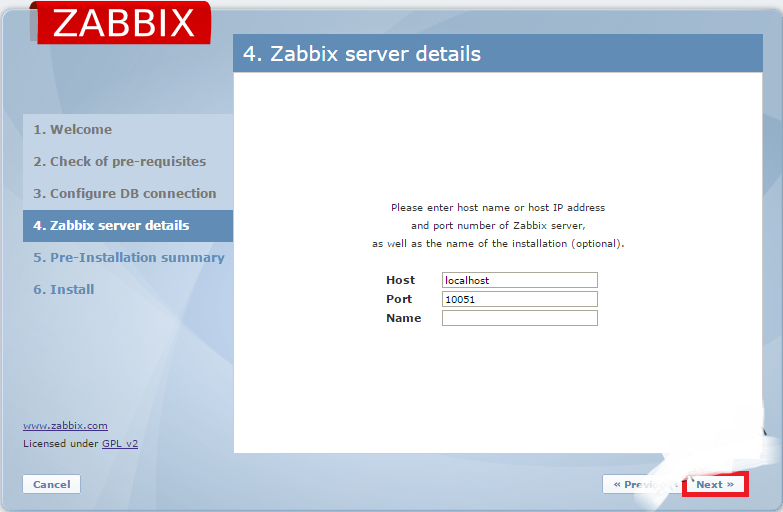 确认配置内容以后,点击[Next]
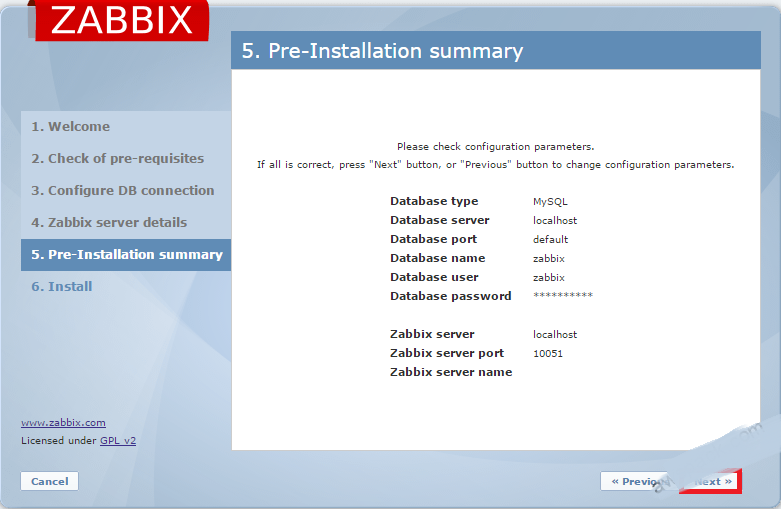
点击[Finish] 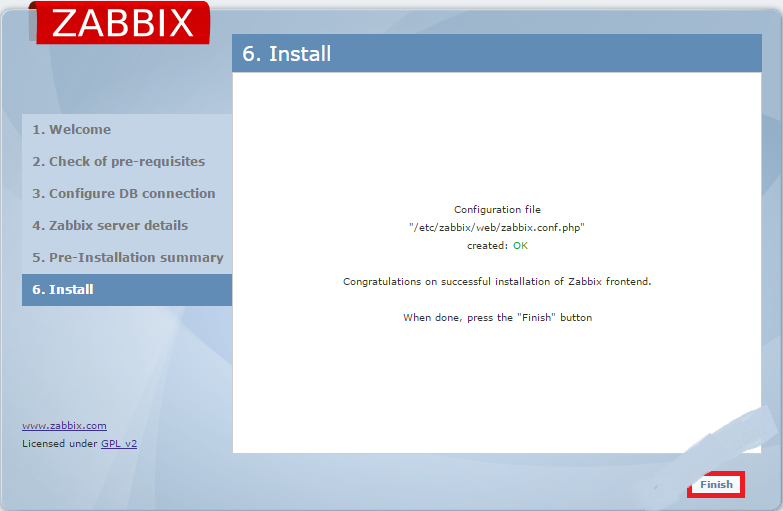
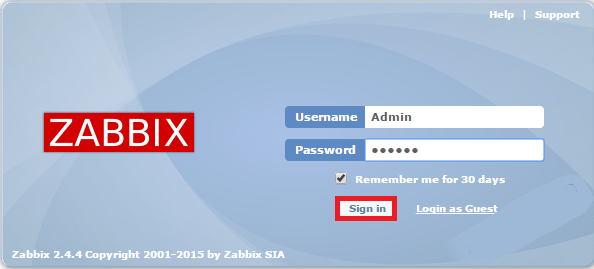
输入用户名及密码之后,点击[Sign in]
- Username:Admin(默认)
- Password:zabbix(默认)